• Home
  • BBQ4Wounded
  • Rub/Spice Store
  • Kudo’s
  • Newscast Blog
  • Tips and Tricks
  • About
  • Contact

7 Primitive Cooking Methods You Still Need to Know Today

February 24, 2022 By Boucanier

You are receiving this email because you purchased our book,
The Lost Super Foods.

Long before we had pots and pans, men and women knelt over fires and used what nature provided to put food on their table (or on the large rock serving as their table that evening).

Today, we have knives, pots, spoons, and even large appliances like food processors. But that doesn’t mean you won’t ever need to know how to cook without them.

Whether you’re camping or in an actual emergency situation, there are 7 common primitive cooking methods that you still would better know even today.
Ash Cooking
This is pretty similar to what we call tin-foil cooking. The difference is that you’ll use leaves instead of aluminum foil.
First, you need to make a fire slowly let it die while flattening the surface with coals of a fire. The coals should be hot but no longer burning (with flames). While the coals are getting hot, find some very large leaves that you can use to cook the food in.
Remember that the leaves need to be large enough so that they can be wrapped around the food, but they also have to be non-poisonous so that you don’t ingest toxins. Bonus points if you find leaves that are also edible. Also, try to find leaves or plants that have vines attached to them. These work well for wrapping around the food and turning it into a little bundle.

A very common and very good example is burdock leaves (see picture above). These leaves are really big and they’ll produce a delicious juicy meal.

Once the food is wrapped and the coals are hot, place the food onto the coals. Using a stick, move some of the hot coals over top of the food so that it can cook on both sides.
Broiling

Broiling over a fire isn’t that much different than broiling in your oven. The only difference is that, over a fire, you might not have a pan to lay the food in, so you’ll need to set something up that can hold the food over the fire without it falling in.

River birch and willow are great woods you can use for broiling over an open fire because they are flexible, and flexibility is key when trying to find the right kind of wood for this type of cooking. You might also need a couple of pieces of the same type of wood; the more you have, the more effective your cooking device will be.

Start constructing your “broiler” by bending one piece of wood into an oval, and crossing the bottom of the oval with another straight stick (think of an upper case D). Use small twigs or vine to tie the oval-shaped wood onto the straight stick.

However, you can also stretch the top piece so that it reaches down the entire straight piece of wood. Then, if you wish to make the wood even more stable, add smaller pieces of wood across the two pieces of wood. This will give support to the food and if you’re handy enough, will also allow you to move the wood up and down to fit specific pieces of food.

Once you have your “broiler” set up, you just need to attach the food to it. When cooking fish, you can do this just by piercing the skin onto some of the wood, and for larger pieces, you can simply lay it across. Then just hold the broiler several inches from the flame to keep it from burning, and keep it flat to keep your food from falling in.
Hot Stone Cooking
Cooking on a hot stone is really no different than cooking in a frying pan. Using a flat surface such as a rock, you just have to heat it up, place your food on, and then heat it up a little more. Be sure that the rock is dry, so it will heat up faster, and that it has at least one flat side so your food doesn’t fall off.
Give it a quick clean by dusting it off with a cloth and make sure it’s thicker than one inch, so that it doesn’t crack when heated to extreme temperatures. You can cook with stone one of two ways.

You can either use a small stone for a single serving, or you can place many stones over a low and wide fire, using them to cook larger quantities or larger pieces of food. For a larger area you’ll need to let the stones heat up for at least an hour, whereas you can probably get away with fifteen minutes or so for just a single stone.

Once the stone is hot, place your food on it and just wait for it to cook through – the time it will take will depend on what you’re cooking and your own taste preferences. Remember to remove the stone entirely once the food has finished cooking and to keep the food on it, using it as a platter or plate. The stone will take at least half an hour to cool down, so it will keep your food nice and hot for you.

Plank Cooking
Unless you can find a smooth, even piece of wood in the forest (which is likely to prove difficult), you’ll need an axe or a saw to create planks suitable for cooking. First, know the type of wood you’re looking for.
Don’t use anything poisonous, and don’t use wood such as conifers, which can have a strong-tasting resin that can seep into your food.
Some of the best woods for making planks are poplar, cedar, and oak.
Find a piece of wood that you think would make a nice plank. If you find a small log, cut it in half and then, placing it on its flattest side, cut planks from it about nine inches in diameter. You can also use two planks at once, letting one hold the food while the other holds the other up, away from the fire and from getting burned. Some people choose to place pegs onto their board, wedging them into holes cut with a knife. However, this extra step isn’t necessary, as you can just leave the board lying flat and the food should remain in place.
Steam Pit Cooking
Steam pit cooking is a form of survival cooking that has been used for centuries.
You must start by wrapping the food in large leaves, just as you do when ash is cooking, and then you need a place where you can build a pit large enough to hold coals and the food. When digging the pit, make sure you dig it at least a foot to two feet deep.
This will be large enough to not only hold the food, but also make sure no steam escapes while cooking. Once the pit has been dug, line the bottom of it with charcoal. Light the coal, again just like you did when ash cooking, and wait for it to get very hot and then die down. Then, place your food over top of the coals and then cover it with the earth you dug up. Allow it to sit for at least a couple of hours (even small food will take a while to cook this way), and then dig it up, and dig in!
Spit Cooking

If you’ve ever checked out a whole chicken spinning slowly on a rotisserie, you’ve already seen spit cooking firsthand. There are both horizontal and vertical spits and if you want the metal rods equipped with teeth that help hold the meat, you’ll likely have to already be carrying this as you won’t find anything like it in nature.

But, you can create your own spit just by finding a strong, long, and sturdy piece of wood.

While tying a piece of meat onto a piece of wood and turning it over an open fire sounds easy, spit cooking does come with its own unique set of issues. To begin with, any meat that can be tied to the spit must be tied to the spit.

This will keep the meat sturdy on the spit and will keep it from bouncing around. Also, it’s important to remember that meat shrinks when it cooks, so even if you think you’ve tied the meat closely to the spit, it still might not be close enough. Use wire, vines, or twine to really secure the meat onto the spit. If you’re roasting a whole animal, also be sure to tie up the limbs. If you don’t the center of gravity will be thrown off and the meat will once again bounce around the spit instead of clinging to it.

Remember too that if you don’t turn the spit, you’re broiling, not spit cooking. Out in the wilderness, and especially in survival situations, you likely won’t have a spit that automatically turns for you, so you’ll have to sit by the fire and manually rotate it yourself.

Clay Cooking
Some think that our earliest ancestors cooked in clay, but that’s just not the case. By the time clay tools were introduced, humans had already been cooking for generations.
But you don’t need to carry around a clay pot that’s prone to breaking while backpacking – dig far enough and you’ll find it. Just make sure that the area you dig for the clay wasn’t once the place of toxic chemicals – such as being the former site of a gas station.

Once you’ve found your clay, you can add a bit of water to mold it into shapes such as bowls and pots, although these will take hours to dry. You can also simply pat the clay onto and around the wrapped piece of food. Be sure when doing it this way that the clay is in an even layer, to promote even cooking. Then, just simply lay the clay-covered package over hot coals and allow it to cook. The time of cooking will depend on not only the size of the food being cooked, but also the thickness of the clay.

Serving food that’s been cooked in clay is one of the most exciting parts of clay cooking. Because the heat will harden the clay around the food, use a small hammer or rock to break open the clay. It will crack and fall apart, and make meal time that much more enticing.

What cooking methods did we miss? Let us know!

The Backyard Superfood You
Can Only Harvest This Spring
You can follow us on:
 

Facebook
Instagram


Copyright 2022 - The Lost Super Foods, All rights reserved.
My mailing address is:
The Lost SuperFoods, 2549 Waukegan RD, PMB 45933, BANNOCKBURN, Illinois 60015-1569, United States
If you think you are receiving too many emails from us,

Filed Under: Cooking, Grilling, Historical Cooking

Never Thaw Frozen Fish In Its Vacuum-Sealed Packaging

October 26, 2020 By Boucanier

Why You Should Never Thaw Frozen Fish In Its Vacuum-Sealed Packaging

Good to know! Did you know this?

Natalie Gould Tomko NATALIE GOULD TOMKO ·JUNE 5, 2018

SHAREPIN IT
Adobe

Botulism is a word often associated with home canning and dented canned goods at the grocery store. But did you know vacuum-sealed, individually wrapped pieces of frozen fish also pose a risk for the bacteria?

I love to buy individually wrapped pieces of frozen fish for portion control and easy meal prep. I’ve bought frozen fish in all varieties for years, so I was surprised when I was shopping for frozen salmon recently and a seafood employee stopped me, saying, “Don’t forget to remove the fish from the packaging before you thaw it.”

No one had ever told me that before. I asked why, and he said that thawing fish in their vacuum-sealed packaging poses a high threat for botulism. Shocking, right?


Adobe


What To Know About Botulism

Botulism is a rare but serious and often fatal illness caused by the bacterium Clostridium botulinum, which attacks the body’s nerves. Symptoms begin with the weakening of the muscles around the eyes, face, mouth and throat. It can then spread to other muscles of the body including the neck, arms, torso and legs. Severe symptoms include breathing difficulty and, in the most serious cases, death.

Turns out, the C. botulinum toxin is created when spores allow it to live in certain conditions, such as — you guessed it — low-oxygen vacuum-sealed packages. The warmer the temperature, the quicker the toxin forms. When temperatures are above 38 degrees Fahrenheit, the risk for botulism increases greatly.


Adobe


Some home refrigerators operate above 38 degrees (Consumer Reports says the ideal temperature is 37 degrees), so removing the fish from its vacuum-sealed packaging is essential to eliminating the risk of botulism. By opening the package, the fish is introduced to oxygen and the spores will not produce the cells that form the toxin.


Adobe


Thawing frozen fish also poses a risk for listeria monocytogenes, more commonly known as listeria. This bacteria can grow and multiply on some food stored in the refrigerator. Pregnant women, newborns, adults age 65 and over, and any adult with a weakened immune system are at a higher risk for listeria.


Adobe


How to Best Thaw Fish

To prevent botulism or listeria, follow these safety guidelines for handling seafood:

1. If you don’t plan on using fresh seafood within two days of purchasing, wrap tightly in plastic, foil or moisture-proof paper and store in the freezer (here are 10 foods you probably didn’t realize you could freeze).

2. The best way to thaw seafood is gradually by placing it in the refrigerator overnight. Avoid cross-contamination by placing the thawing seafood far away from any fresh produce items.


Adobe


3. If you need to thaw a piece of fish quickly, place it in a zip-top bag and immerse in cold water. If you plan on cooking the fish immediately after thawing, you can use the defrost setting on the microwave but only to the point that the fish is icy but pliable.

4. Never thaw any frozen meat or seafood on the counter at room temperature.

Stay Informed - Sign up Today

TaTu FOOD

TaTu Food is a bi-monthly curated publication full of interesting, relevant links. Subscribe now and never miss an issue. 

You can unsubscribe anytime. For more details, review our Privacy Policy.

Marketing Permissions

The information you provide on this form will only be used to provide you with updates and personalized information. Your privacy is important to us! Please let us know how you would like to keep in touch:

We will send you occasional emails about promotions, new products and important updates to keep you in the loop.

By clicking below to submit this form, you acknowledge that the information you provide will be processed in accordance with our Privacy Policy.

Thank you!

You have successfully joined TaTu BBQ subscriber list.

.

Filed Under: Cooking Tagged With: Food Safety

Basic Meat Science For Cooks

September 24, 2020 By Boucanier


Basic Meat Science For Cooks

By Meathead Goldwyn

What is meat?

Every time you step up to your grill or into your kitchen, you begin a science experiment. As meat is heated, it undergoes physical and chemical changes, and as scientific as these processes are, they are also magical. A basic understanding can help you cook juicier chicken breasts and more tender steaks. This article is an overview and the links within take you to articles that explain the concepts in greater detail.

fat types

"My foe, my enemy, is an animal. In order to conquer him I have to think like an animal and, whenever possible, to look like one. I've got to get inside this dude's pelt."Carl Spackler (Bill Murray) in Caddyshack, 1980

Meat is cut from the muscles of mammals and birds. For some reason, fish muscle is not considered meat by some people, but it should be.

lean muscle tissue contents

On average, lean muscle tissue typically breaks down like this: Water (about 75%), protein (18%), fats (5%), carbohydrates, salt, vitamins, sugars, and minerals (2%). Here are some specifics.

Animal
Water
Protein
Fats
Other
Beef 72% 21% 6% 1%
Pork 69 20 10 1
Chicken 73 21 5 1
Lamb 73 20 5 2
Cod 81 17 1 1
Salmon 64 21 14 1

Different cuts from within an animal can differ significantly. As shown above, the average water content of pork is 69%. Pork rib meat, however, is more like 65% water, 18% protein, 15% fat, and 2% carbohydrates, salt, vitamins, sugars, and minerals. Even so, 65% is a pretty high percentage of water. With that much water in the meat, any loss you might have from stabbing it with a thermometer or an occasional stab with a fork is minor, so don't let the snobs tell you that you are going to ruin the meat if you use a thermometer to check its temp or a fork to turn it. To illustrate: if you have an 8-ounce filet mignon, 6 ounces is water. Stab it and a few drops leak out from the puncture site, an insignificant part of the 6 ounces. Meat is not a balloon that goes phffffft and deflates when you poke it with a thermometer or fork

anatomy of a muscle

Muscle cells

Muscle cells are more frequently called muscle fibers because they are shaped like tubes. Muscle fibers bundled together are called sheaths, and sheaths bundled together are called muscle or meat.

The fibers, about the thickness of a human hair, contain several types of protein, among them myosin and actin which bind up water and act like living motors by contracting and relaxing on command. As animal ages, grows, and exercises, its muscle fibers get thicker and tougher. And muscles like shoulders and legs get thicker and tougher than the smaller, more tender muscles call "tenderloins" that run along the animal's spine.

myoglobin meat juices in chateaubriand

Myoglobin is another important protein in muscle fibers. Myoglobin receives oxygen and iron from hemoglobin in the blood, the fuel necessary for muscles to function. Myosin and actin are not water-soluble, but myoglobin is water-soluble, and myoglobin dissolved in water is the pink liquid we see seeping out from a package of raw meat or spilling onto the plate when we cut into cooked meat. When warmed, those meat juices lose their red color, become pink, and eventually tan or gray. Fibers also contain other proteins: enzymes. Enzymes play an important role in aging meat.

meat parts

Connective tissue

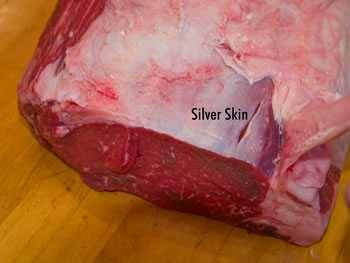
Connective tissue is most obvious in the form of tendons that connect muscles to bones. It is also visible as the thin shiny sheathing that wraps around muscles called "silverskin" and in ligaments that connect muscles to other muscles. These tougher, chewier, rubber band-like connective tissues are mostly protein and appropriately named elastin. We call them gristle and they shrink when heated and become unchewable. As with muscle fibers, connective tissues thicken and toughen as an animal exercises and ages.

A softer connective tissue called collagen is scattered throughout the muscle, often surrounding fibers and sheaths holding them together. When you cook, collagen melts and turns to a rich liquid called gelatin, similar to the stuff Jell-O is made from. Cooked muscle fibers, no longer bound together by collagen, are now uniformly coated with a soft, gelatinous lubricant. This smooth and sensual substance enrobes meat in a wonderfully silken texture and adds moisture. And yes, this is pretty much the same stuff the Hollywood wives have injected into their faces to get rid of wrinkles.

Lean meats like beef or pork loin and tenderloin, as well as most chicken and turkey, don't have much collagen. When cooking tough cuts of meat with lots of connective tissue, like ribs, brisket, and shoulder, it is important to liquefy the meat's connective tissue into gelatin: that's what makes these tough meats taste tender. This takes time. That's why these cuts are often cooked low and slow. Muscle fibers start seizing up around 125°F to 140°F if heated quickly. But when heated slowly, the rubber band-like connective tissues have time to relax and do not squeeze tightly. In general, it is best to cook all meats at about 225°F. Slow roasting does wonders for meat. The AmazingRibs.com science advisor Prof. Greg Blonder says "Think of silly putty. Pressed hard and quickly, it acts like a rigid solid. Pressed slowly, it flows." When heated slowly, the muscle fibers, instead of wringing out moisture, relax and simply let water linger inside until evaporation drives it out.

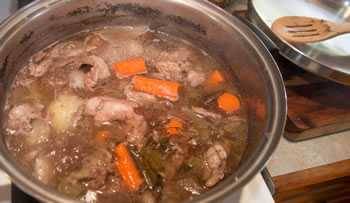
After it melts, as it chills, gelatin can solidify into that jiggly stuff which, with a little filtering, can then be called aspic and served at bridge clubs. Here's a pot of the stuff made simply by boiling a couple of chicken carcasses in water after I ate the meat, discarded the bones, and chilled the liquid. The white is fat, most of which I have removed, and the tan is jiggly gelatin.

gelatin aspic

Fats

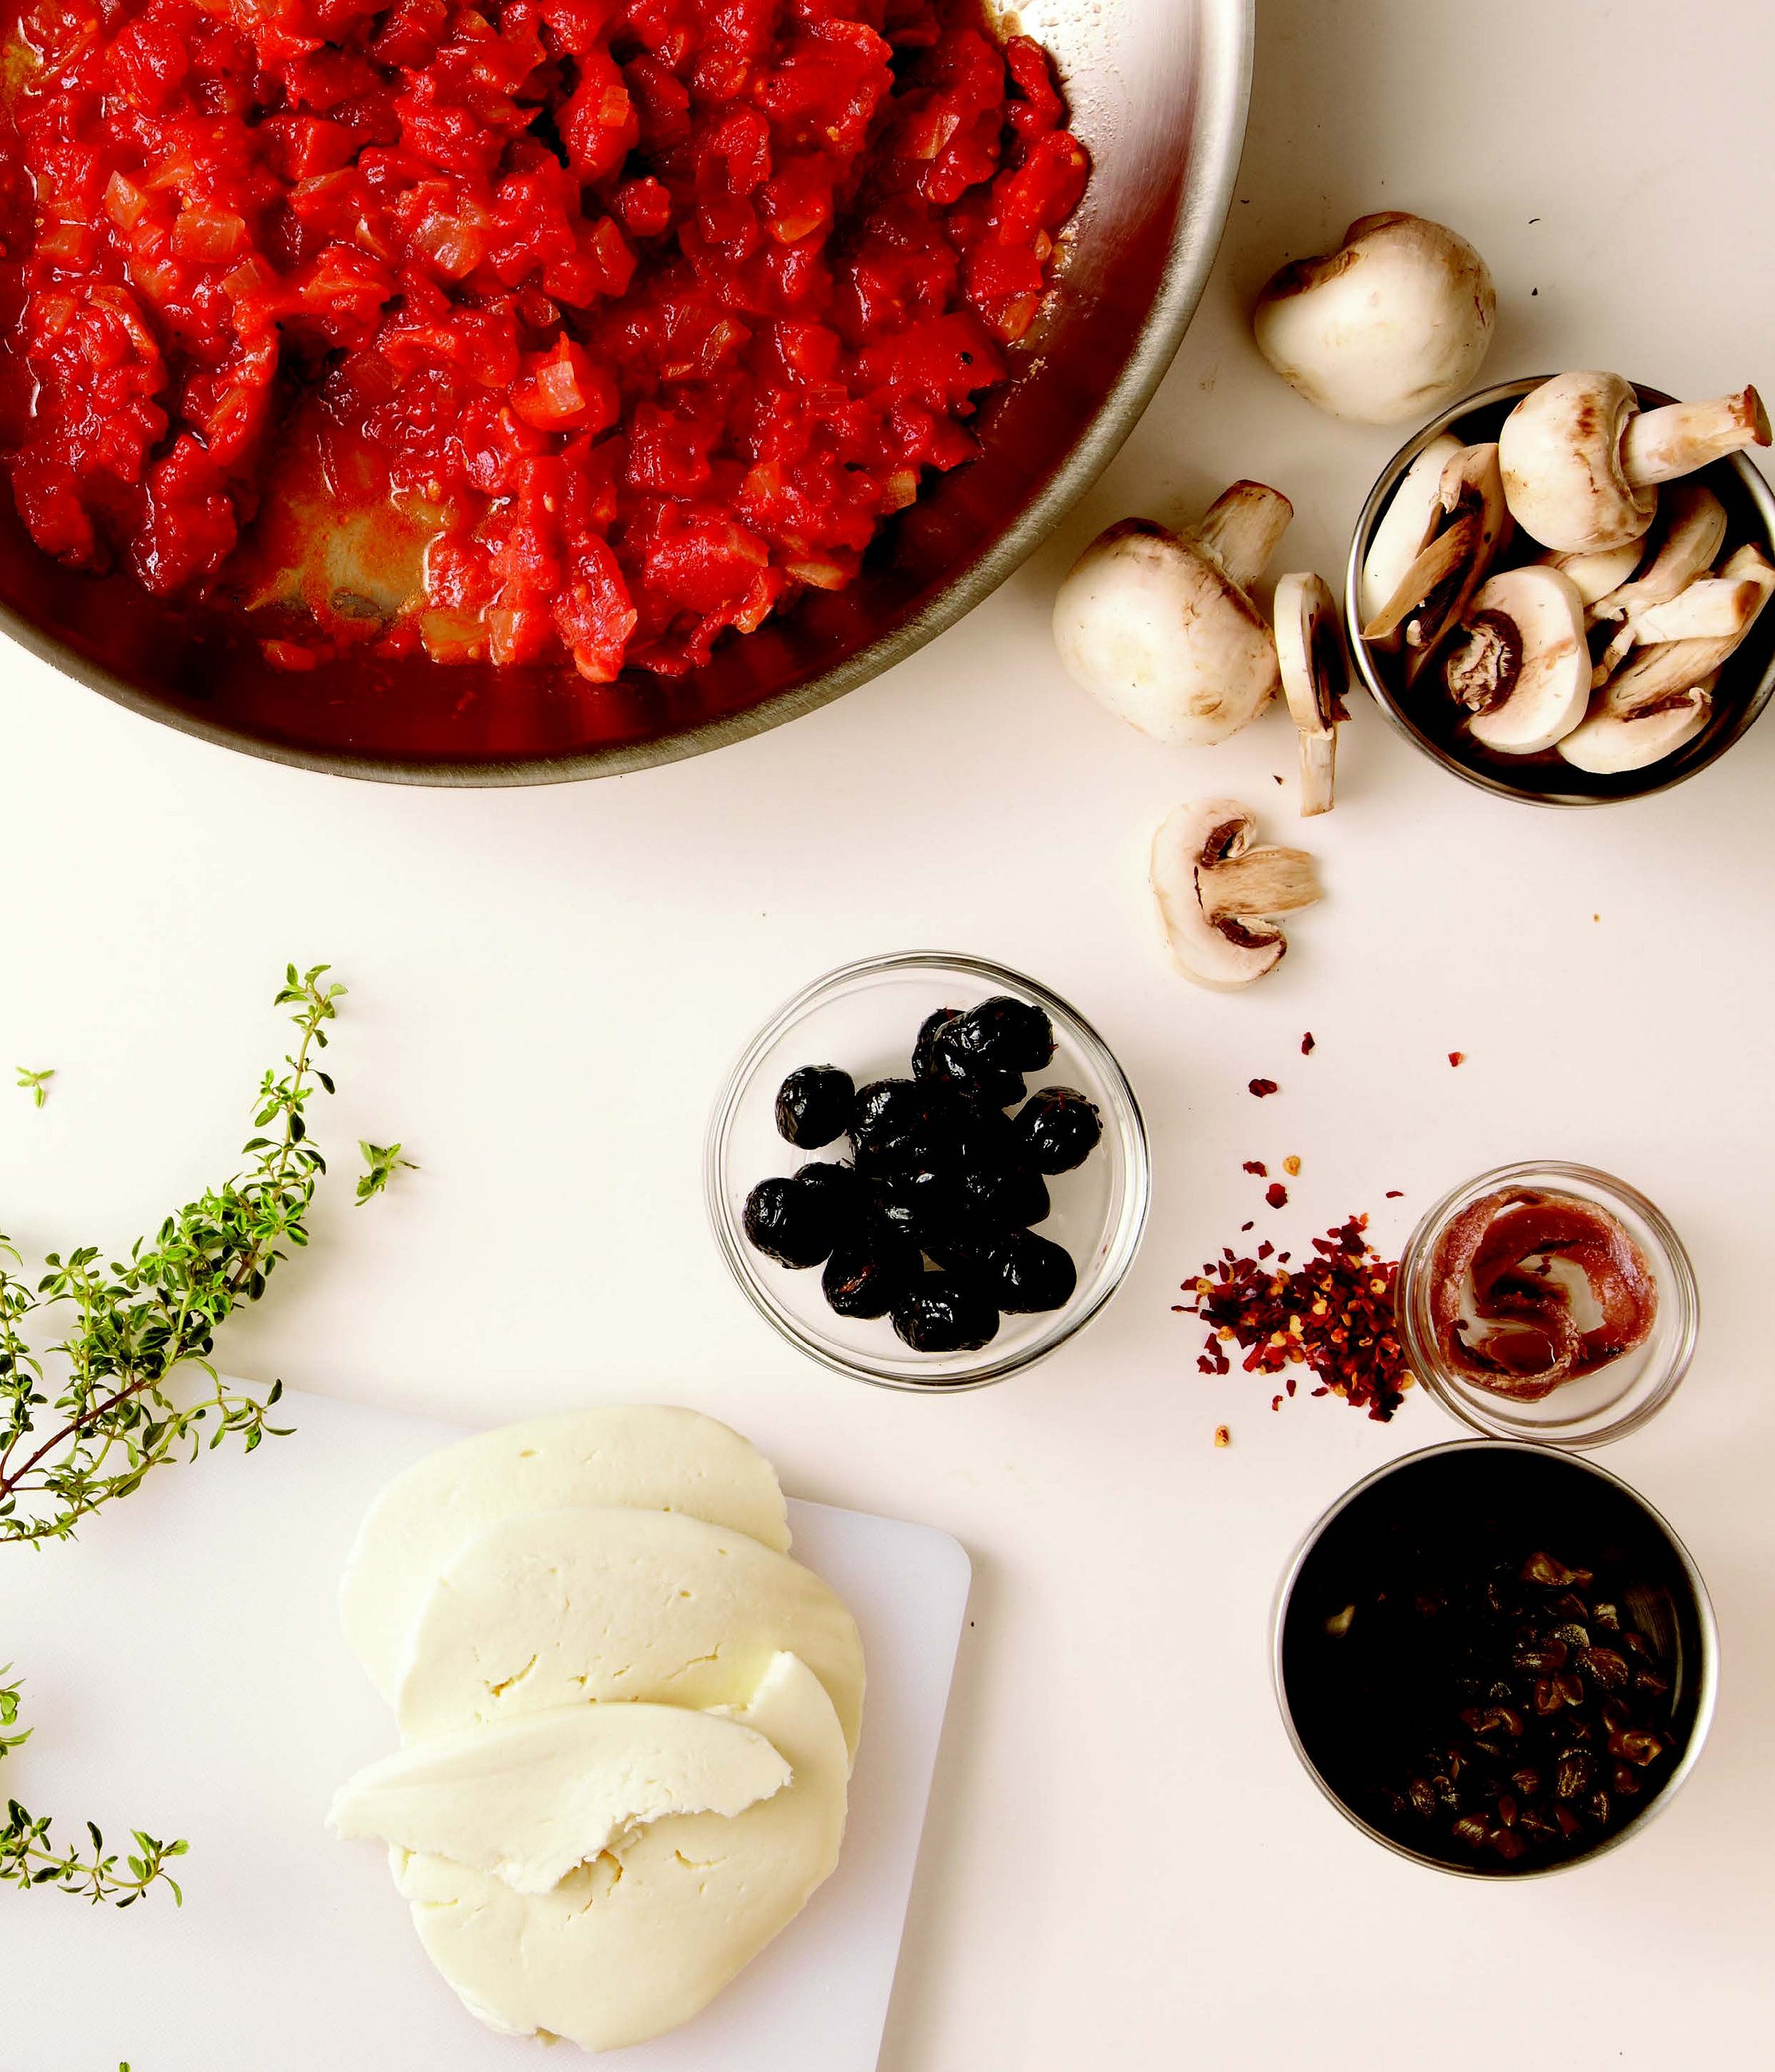
Fats (lipids) and oxygen are the main fuels that power muscles. Fats are packed with calories, which are potential energy released when the chemical bonds are broken. From a culinary standpoint, fat comes in three types (see the photo at the top of the page):

  1. Subcutaneous fats are the thick hard layers beneath the skin.
  2. Intermuscular fats are layers between muscle groups.
  3. Intramuscular fats woven amongst the muscle fibers and sheaths improve meat's moisture, texture, and flavor when cooked. These threads of intramuscular fat are called marbling because they have a striated look similar to marble.

Large fat deposits can also be found around organs, especially kidneys. On hogs, the best fat of this type, at least from a culinary standpoint, especially if you make pie crusts, is called leaf lard, and it comes from around the kidneys.

Fats are crucial to meat texture. Waxy when cold, fats start to melt around 130°F to 140°F, lubricating muscle fibers just as they are getting tougher and drier from the heat. Fat does not evaporate like water when you are cooking.

Fat also provides much of the flavor in the meat. It absorbs and stores many of the aromatic compounds in the animal's food. As the animal ages, those flavor compounds build up and get more noticeable. After the animal is slaughtered, the fat can turn rancid if stored too warm, too long, or in contact with oxygen. So we have a tradeoff. The muscle fibers and connective tissues get tougher as the animal ages and exercises, while the fat accumulates and builds flavor.

Fats, especially animal fats, are the subject of great debate among scientists, doctors, dietitians, and health faddists. For many years, animal fats were thought to be dangerous and avoided. It is now thought that fats, even animal fats, contain many beneficial components, and current science argues that, in moderation, they are essential for health. A great deal of interesting research on the subject is going on as I type this. A great deal of research is contradictory. Read more about what I have learned about food and health in this article.

Fluids

Most of the liquid in meat is water. The reddish color in meat and its juices is not caused by blood. It is the protein myoglobin dissolved in water. Myoglobin is found only in muscle, not in the bloodstream. The blood is pretty much all drained out in the slaughterhouse. If the stuff on your plate when you sliced steak was blood, it would be much darker, like human blood, and it would coagulate, like human blood. If the fluids were blood, then pork and chicken would be dark red. It's mostly just water, so let's stop grossing out our kids, and just call it juice. OK? Every time you call meat juices blood, a bell rings and a teenager becomes a vegan. Click here to Tweet this bit of wisdom

When animals are alive, the pH of the muscle fibers is about 6.8 on a scale of 14. The lower the number, the higher the acidity. The higher the number, the more alkalinity and less acidic. At 6.8, living muscle is just about neutral. When the animal dies, the pH declines to about 5.5, making it acidic. At this pH, muscle fibers form bunches and squeeze out the juice, called a purge, and that is the juice you see in packages of meat that is absorbed by the diapers they put under the meat.

Slow-twitch vs. fast twitch muscles

Muscle fibers need fat and oxygen for fuel. Fat comes from fatty acids in the animal's blood that were created by the digestion of its food. Oxygen is carried by the protein hemoglobin in the bloodstream, and it hands the oxygen to myoglobin within the muscles.

In general, the more exercise a muscle gets, the tougher it is, and the more oxygen-laden myoglobin it needs. Myoglobin turns meat darker and makes it more flavorful. Dark meats, like chicken thighs, are made of "slow-twitch" muscles that have evolved to endure slow, steady movement, and they are loaded with juicy myoglobin. White meats, like chicken breasts, are mostly "fast-twitch" muscles, which are better suited to brief bursts of energy, and they have less myoglobin. Dark meats also have more fat for energy.

When cooked, the slow-twitch muscles in dark meat have more moisture and fat and are more flavorful than white meat. White meats contain less moisture and fat, and they dry out more easily when cooked. The legs and thighs of chickens and turkeys are good examples. These animals get more exercise standing and walking than flying, so the legs and thighs have lots of slow-twitch muscles, more pigment, more juice, more fat, and more flavor. They are also slightly more forgiving when cooked. Modern chickens and turkeys have been bred for large breasts because white meat is more popular in this country (and I for one, can't understand why). I'll take tough and flavorful over tender and mild any day.

[Like what you’re reading? Click here to get Smoke Signals, our monthly email that tells you about new articles, science, recipes, product reviews, and more. Be Amazing!]

Ducks and geese excel at flying and swimming, and they get more exercise than chickens and turkeys, so these birds have more dark meat. Duck breasts are deep purple, almost the same color as lamb or beef.

When the conventional wisdom was that dietary fat could cause heart and arterial problems, domestic pigs were bred to have less intramuscular fat. The modern pig does not get much exercise due to its transmogrification into "the other white meat." In recent years, research has questioned the relationship between dietary fat and health, and many experts extol fat's benefits.

Beef is all pretty much the same color, but slow-twitch muscles like flank steak have bigger, richer flavor than some of the lesser-used muscles like tenderloin.

Fish live in a practically weightless environment, so their muscles are very different. Fish muscles have very little connective tissue, and that's one reason why fish never gets as tough as pork when cooked. But fish can dry out because there is not much collagen to moisturize the muscle fibers. The color and texture of fish vary depending on the life it leads. Small fish that swim with quick darting motions have mostly fast-twitch muscles and white meat, while flounder, which lives on the seafloor, has delicate flaky flesh. Torpedos like tuna and swordfish swim long distances with slow steady tail movements, so they have had firmer, darker, sometimes even red flesh. For these reasons and others, fish can spoil within days of being caught, while red meats keep much longer.

Brown is beautiful, black is bad

steak on the grill

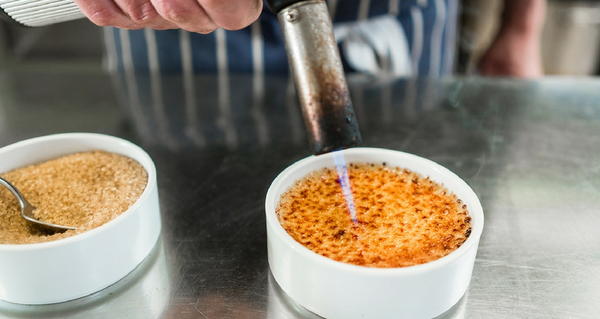
As meat cooks, the most magical transformation that occurs is the Maillard reaction. It is named for a French scientist who discovered the phenomenon in the early 1900s. The surface turns brown and crunchy and gets ambrosial in the aroma. Who doesn't love the crispy exterior of a slice of roast beef, the browned crust on freshly baked bread, or the crackling surface of a roasted marshmallow? We don't think twice about it, but that brown color on the surface is the mark of hundreds of compounds created when heat, especially heat above 300°F, starts changing the shape and chemical structure of the amino acids, carbohydrates, and sugars on the surface of the meat. Click here to learn more about the Maillard reaction and caramelization.

What you don't want is black meat. Let it go too far and it turns to carbon. Carbonized meat may be unhealthy.

Pretty in pink

anatomy of a baby back

There's another color you may notice in cooked meat: pink. Many smoked types of meat turn bright pink just under the surface. Some people think that the pink color means that meat is raw, but not in this case. If the meat were undercooked, the pink would be in the center, not just below the surface. Pink meat near the surface is a common phenomenon called the smoke ring and it is caused by gases in smoke preserving the color of myoglobin. Some people think the smoke ring improves taste. That's a myth too. Click here to read more about the smoke ring and what causes it.

Cook with a thermometer, not a clock

Different cuts of meat vary significantly in tenderness, fat content, and collagen content. Some are best cooked hot and fast, some better cooked low and slow, and some must be cooked with a combination of hot and slow to reach their optimal taste and texture. Click here to read an article on the subject of cooking temps.

AmazingRibs.com meat temperature guide

This is why cooking times are guesstimates at best. Think about the absurdity of a recipe that says, "cook the steak for six minutes on the first side and then four minutes on the second side." How long it takes to cook depends on how hot the air and the cooking surface are, how thick the meat is, and your target temp. Depending on the grill, cooking steaks could take twice as long or half as long. Thick steaks take more time, and if you want them rare, they'll take less time than in if you want them well done. Click here for more on cooking times and what controls them.

You cannot tell if the meat is safe or cooked to the proper temp by looking at it. When you cut into the meat to look at it, it can change in a few minutes after it has been exposed to oxygen. Compounds in marinades and brines can impact color. Sometimes vegetables in the grill can produce gases that alter meat color. It has long been thought that when chicken juices run clear the meat is safe, but modern chicken farming has changed that. Use a thermometer. Click here to read how we bust the myth of clear chicken juices.

The truth is, meat can go from succulent to sucky in just a few minutes. The only way to be sure about doneness is to use a digital thermometer. Overcook meat and you've wasted your money. Undercook it, and you could give someone a tummy ache or much worse. That is why you ALWAYS cook with a thermometer, not a clock. This is the 21st century. The digital age. Stop using 19th-century technology. Ditch your dial telephone and your dial thermometer.

grill thermometer comparison

And while you are at it, get a digital oven thermometer. The cheap dial thermometer that came on your grill or smoker is probably off by 25 to 50°F like the one above. I have seen them off by 100°F!

Click this link for a buying guide to thermometers with more than 150 test results from our on-staff electrical engineer.

As the internal temp of meat climbs, more water gets squeezed out, and the meat becomes drier. In general, most meats are juiciest when cooked to medium-rare, 130 to 135°F internal temperature.

But that's not hot enough for safety in some meats. Ground meats and poultry are health risks at those temps. Ground meats need to be cooked to 160°F, and poultry needs to go to 165°F to kill pathogenic bacteria. But there's more to the story than that. You can actually serve these meats at lower temps if you know the rules. Read my article on meat temperatures.

Meats with a lot of connective tissue such as beef and pork ribs, pork shoulder, and beef brisket, are too tough at these lower temps. They need to go up to 200 to 205°F in order to gelatinize collagens and melt fats. That's well past well done, and yes, water is lost, but the gelatin and melted fats lube the meat and make it taste tender and juicy.

Be aware that if you let the meat sit around after you remove it from the heat, the heat built up in the outer layers will push down to the center and overcook the meat, a process called carryover cooking. The good news is that resting meat is probably not necessary, despite what all the TV chefs say. For more about ideal serving temps, read my detailed Food Temperature Guide, which has a handy printout for your fridge.

What happens when you cook?

Hot air cooks the surface of the meat, but it cannot penetrate, so the energy built up on the outside of the meat moves slowly towards the center, eventually cooking the meat throughout. As the internal temp of your meat rises, its color is not the only thing that changes. A number of chemical and physical reactions take place, as the molecular structure of proteins and fats are altered by heat. Different reactions kick in at different temperatures.

Here's a general guide to temperatures organized from cold to hot. The meat temps shown here are approximate because other variables come into play such as the age of the animal, acidity, salt content, type of heat, humidity, etc. This info has been gathered from multiple sources, including meat science research papers, textbooks, and Harold McGee's important book, On Food And Cooking. Click here for a complete guide to target cooking temperatures.

0°F (-18°C). Ideal freezer temperature.

25°F (-4°C). Meat freezes. The meat starts to freeze at a lower temperature than water because the water in meat is combined with proteins. Water expands as it freezes and sharp-edged crystals form that can rupture cell walls, creating "purge" when the meat is thawed, which is a spilling of liquid, mostly the pink fluid protein called myoglobin. Faster freezing makes smaller crystals, resulting in less purge.

32°F (0°C). Water freezes.

34-39°F (1-4°C). Ideal refrigerator temperature. Water is not frozen, and microbial growth is minimized. You do have a good refrigerator thermometer, don't you?

41-135°F (5-57°C). The "USDA Danger Zone," in which many pathogenic bacteria grow, sometimes doubling in number in as little as 20 minutes. According to the USDA, cold foods must be stored below 41°F (5°C), and hot foods above 135°F (57°C). That's why we don't leave meats sitting around to come to room temp.

60°F (15°C). When chilling cooked meat, liquid gelatin forms a solid gel called aspic. Gelatin happens when connective tissues that wrap muscle fibers and connect them to bones, called collagen, melt. Yep, it's the same stuff they inject under your skin to hide wrinkles.

95-130°F (35-54°C). Animal fats start to soften and melt.

114°F (46°C). Myofibrillar proteins begin to gel, changing meat texture.

120°F (49°C). Myosin, a protein involved in muscle contraction within fibers, begins to lose its natural structure. It unwinds or unfolds, a process called denaturing. It starts to clump, gets milky, and begins firming up the muscle fibers. Purple meats, called "rare," start turning red. Fish begins to flake, and parasites begin to die.

130°F (54°C). Many pathogenic bacteria begin to die, slowly at first, but as the temp rises, they croak more rapidly. At this temp, it takes more than two hours to pasteurize meat. At 165°F (74°C), it takes just seconds.

130-135°F (54-57°C). Medium rare. Most mammal meats are at optimum tenderness, flavor, juiciness. If you eat your meat well-done, you need to snap out of it.

130-140°F (54-60°C). Fats begin to liquefy, a process called rendering. This is a slow process and can take hours if the meat is held at this temp.

140°F (60°C). Connective tissues called collagens begin to contract and squeeze out pink juice from within muscle fibers into the spaces between the fibers and out to the surface. Meat begins to get dry. Myoglobin, the pink protein liquid within muscle cells, denatures rapidly and red or pink juices begin to turn clear or tan and bead up on the surface. It is not blood!

150°F (66°C). Actin, another protein important to muscle contraction in live animals, begins to denature, making meat tougher and drier still.

150-165°F (66-74°C). This is "the stall zone," in which large cuts such as pork butt and beef brisket seem to get stuck for hours when cooked at low temperatures like 225°F (107°C). In this range, moisture evaporates and cools the meat like sweat on an athlete. Inexperienced cooks panic. Eventually, temps start rising again. Whew!

155°F (68°C). Known as "well done," meats are overcooked at this internal temperature. Much moisture has been squeezed out, and fibers have become tough. Bacteria are killed in less than 30 seconds, but spores can survive too much higher temps.

160-165°F (71-74°C). The "instant kill zone." Normal cooking temps kill microbes on the outside of meats rapidly, so solid muscle meats are not likely dangerous since contamination is almost always on the surface. But ground meats and poultry often have bad guys beyond the surface, so you must cook these meats beyond the instant kill zone. That's why the recommended internal temp for ground meats is 160°F (71°C) and for poultry is 165°F (74°C). When you reheat foods, you should take them up to 165°F 75°C).

160-205°F (71-96°C). Tough collagens melt and form luscious gelatin. The process can take hours, so low and slow cooking creates the most gelatin. Dehydrated muscle fibers begin to fall apart and release from the bones. Meat becomes easy to shred. Even though the fibers have lost a lot of water, melted collagen and fat make the meat succulent.

212°F (100°C). Water boils at sea level. The boiling point declines about 2°F for every 1000' above sea level.

225°F (107°C). Ideal air temperature for "low & slow" cooking of meats high in connective tissue. It is high enough so the water evaporates from the surface to help form the desired crust called "bark," but low enough to get the most out of enzymes, collagen melting, and fat rendering.

230-234°F (110-112°C). Table sugar melts and pulls into a thread but will not form a ball (thread stage).

300°F (149°C). Butter starts to smoke.

310°F (154°C). The Maillard reaction accelerates surface browning, which is caused by chemical changes in proteins and sugars and results in thousands of delicious new molecules. The Maillard reaction begins at lower temps but really takes off at 310°F (154°C).

320°F (160°C). Table sugar liquefies, starts to caramelize, turns light amber in color (clear liquid stage).

325°F (163°C). Ideal air temperature for cooking chicken and turkey so skin browns and fat renders.

350°F (177°C). Table sugar and brown sugar begin to burn (burnt sugar stage).

361°F (183°C). Some animal fats begin to smoke.

375°F (191°C). Extra virgin olive oil begins to smoke.

400°F (204°C). Canola oil begins to smoke.

425°F (218°C). Teflon thermometer cables can begin to melt.

440°F (227°C). Inexpensive olive oil begins to smoke.

450°F (232°C). Peanut oil begins to smoke.

450°F (232°C). Some nonstick surfaces begin to emit toxic gases.

570-750°F (299-399°C). Primary combustion temperature of hardwood, wherein it smolders and releases large quantities of unburned gases, including microscopic particles called smoke.

600-700°F (316-371°C). Flashpoint or fire point, the temperature at which smoke from burning fat can burst into flame. Never use water to extinguish burning fat. Smothering it works better.

1110°F (599°C). Secondary combustion of wood when gases, cellulose, and lignin burn rapidly.

What causes properly cooked pork and poultry to be pink, even if it is not smoked?

Several factors: Gases in the atmosphere of an oven, particularly carbon monoxide, can react with myoglobin in meat and turn it pink, especially on the outer edges. These gases occur in all ovens, especially those that heat by combustion such as gas, charcoal, or wood. They are also present in electric ovens but to a much lesser degree. When grilling or smoking, there are more of these gases. They more easily penetrate the thinner skin and fat layers of younger animals, so the age of the animal is also a factor.

Also, meats with high levels of naturally occurring compounds such as myoglobin are more likely to turn pink. Nitrites in meat can also cause pinking. Nitrites are converted from nitrates in feed and water by microorganisms within the animal. Nitrates naturally occur in many leafy vegetables and can transfer to the meat during cooking, say, from a rub or braise. In fact, grocery store meat trays are occasionally packed with carbon monoxide or nitrogen to keep the meat in the pink.

Why is raw red meat sometimes bright red on the outside and dull gray on the inside?

Fresh cut or ground beef is purplish-red in color. Oxygen reacts with the pigments in red meat to form the bright red color in the grocery store. The interior of the meat may be gray or brown because oxygen has not penetrated into the muscle. This is normal. If, however, all the meat in the package has turned gray or brown, it may be spoiling.

What is spoilage?

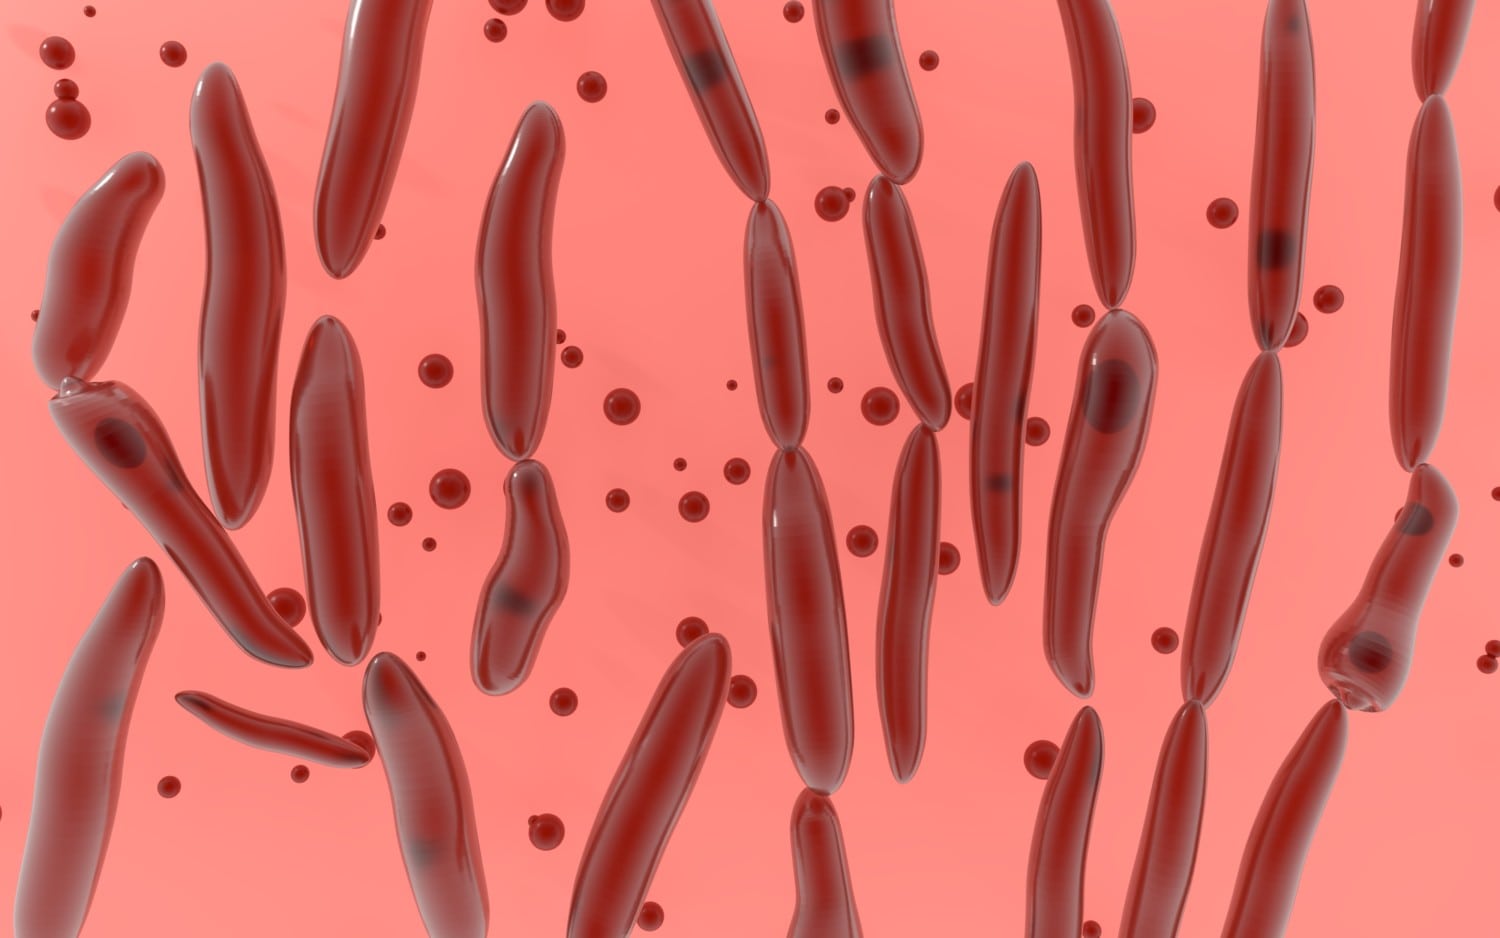
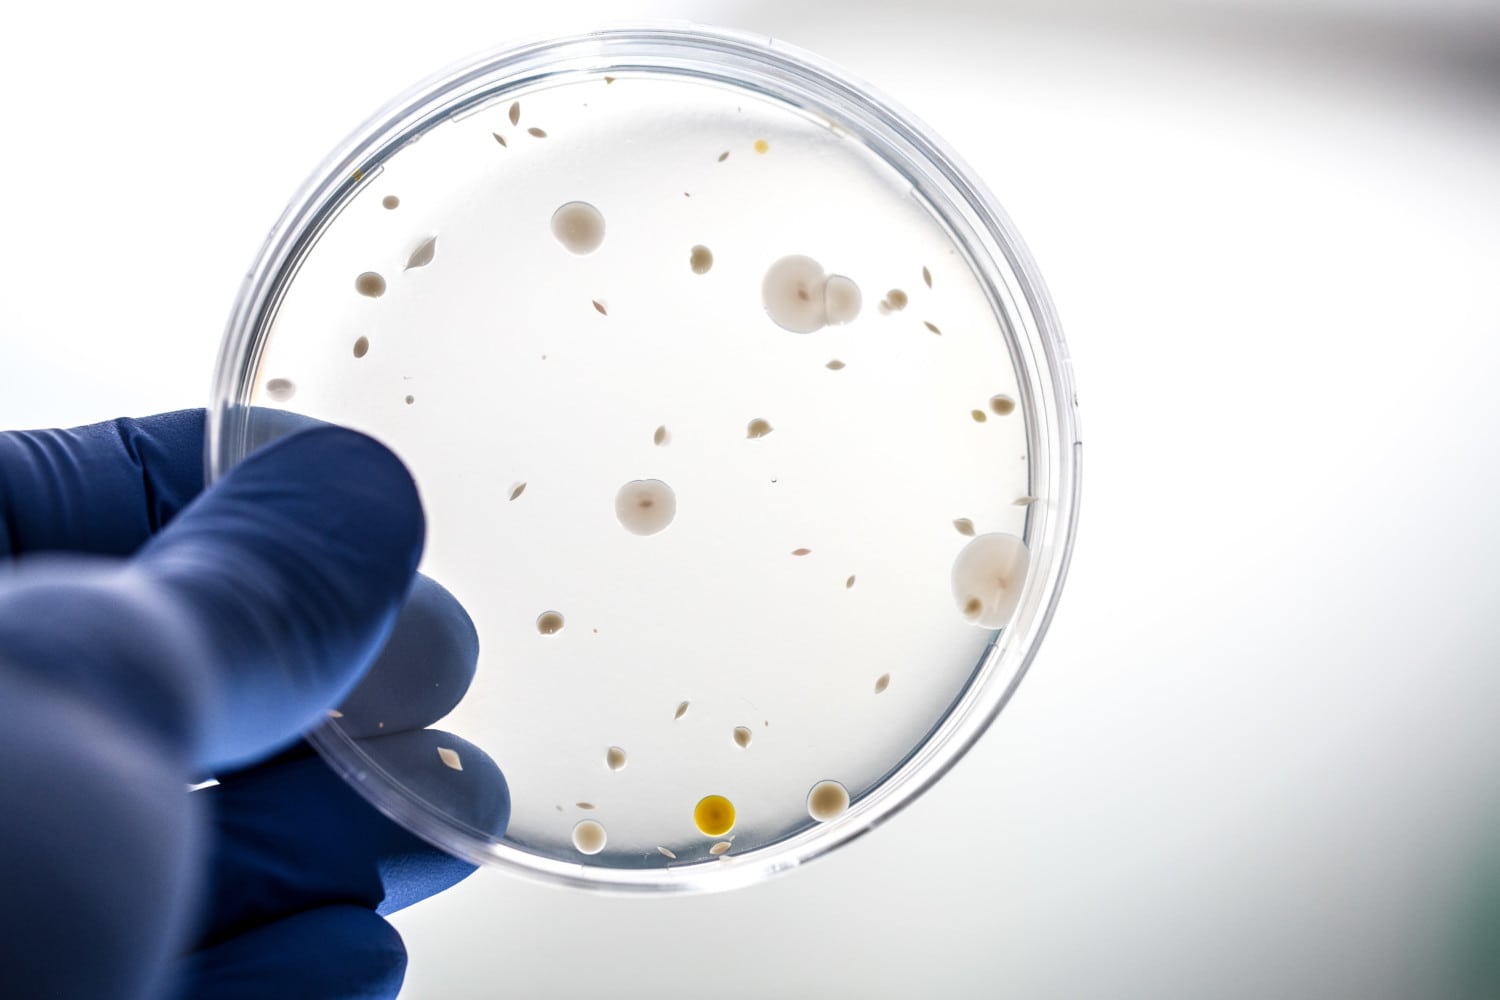
There are two types. Oxidation is caused by compounds in meat combining with oxygen and changing the meat's smell, flavor, and color. Badly oxidized meat is called rancid. But oxidized meat is usually not dangerous. The other type of spoilage is bacterial or viral spoilage, and it is very dangerous. There are several commonly occurring bacteria in food that can spoil it, such as are Bacillus cereus, Campylobacter jejuni, Clostridium botulinum, Listeria monocytogenes, Salmonella, Shigella, Staphylococcus aureus, and STECs (Shiga toxin-producing E-coli). Some of these bacteria will merely have you kneeling before the porcelain god, but others can maim or kill you. You can begin killing bacteria by cooking food to a safe temperature of 131°F or higher. At 165°F, bacteria are killed instantly. At 131°F, it can take hours. For more on bacterial kill temps, click here and scroll down.

Why is meat in my fridge is turning brown?

At first, oxygen reacts with pigments to turn meat red. After a while, the meat starts to oxidize, which turns it brown, the same way an apple or potato turns brown.

Why does my meat shine like a rainbow?

It is simply a fluke of lighting that strikes the surface just the right way when the surface has been cut on a certain angle. Strictly refraction, not bacteria or an oil slick.

Why is my meat green?

Bad bacteria. Throw it out.

Why are there are dry white spots on my meat from the freezer?

That's freezer burn. It's like frostbite. The meat has probably been in the freezer too long and/or it was not wrapped tight. It is still safe, but the burned parts will probably be dry and bland. Trim it off and cook it, but don't serve it to Mom or the boss.

My meat smells funny, what should I do?

Sometimes meat will smell a bit odd when you take it out of a vacuum-sealed plastic bag, but the smell should dissipate within a few minutes. If it still smells funny, then chances are it is funny. Throw it out. Remember: when in doubt, throw it out!

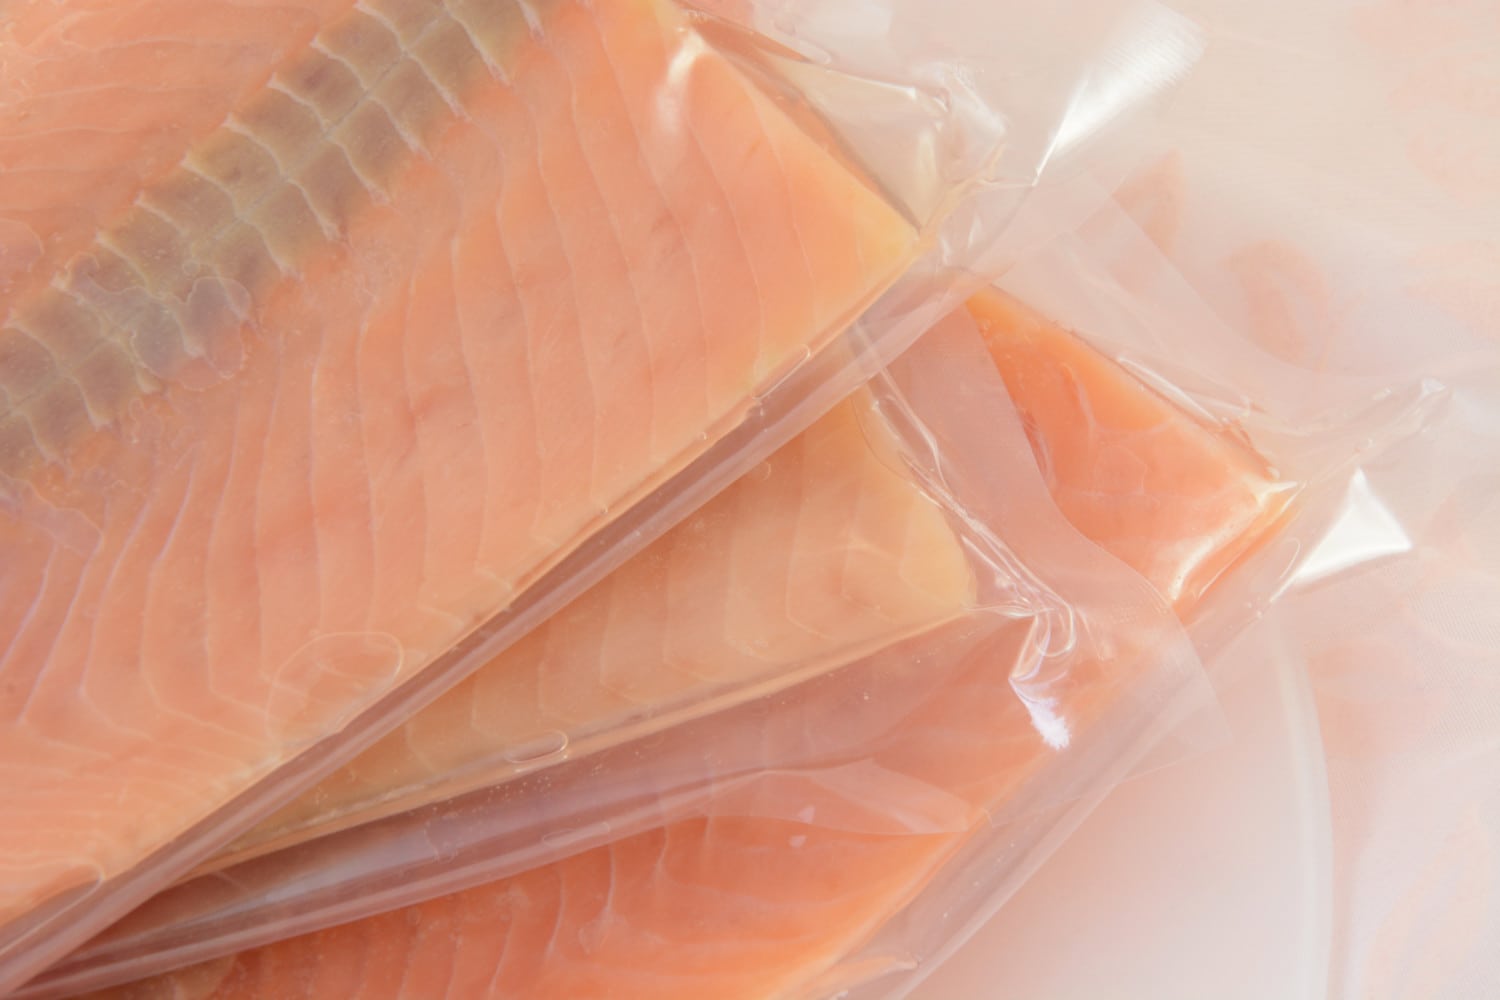
What are those boogers coming out of my burgers and my salmon?

hamburger myoglobin

salmon boogers

According to the AmazingRibs.com meat scientist,  Dr. Antonio Mata, hamburger exudates (I call them boogers) are proteins dissolved in water, mostly myoglobin. When burgers are ground, plump muscle fibers are sheared open. As the meat begins to heat, protein and collagen shrink and squeeze out the proteinaceous fluids, which are pink at first, and then they gel and turn tan just like the meat.

In salmon, boogers consist of another group of proteins dissolved in water called albumin. The albumin is pushed to the surface by shrinkage caused by heat. Brining helps minimize it, but not always. Salmon boogers can usually be wiped off with a paper towel or a brush. Another good technique is to paint the surface with a simple wash of sweet wine, mirin, or a glaze.

Published On: 01/13/2014 Last Modified: 11/18/2019

Meathead Goldwyn

Meathead is the founder and publisher of AmazingRibs.com and is also known as the site's Hedonism Evangelist and BBQ Whisperer. He is also the author of "Meathead, The Science of Great Barbecue and Grilling", a New York Times Best Seller and named one of the "100 Best Cookbooks of All Time" by Southern Living.

Filed Under: Cooking Tagged With: Meat Cooking Science

9 Tomato Sauce Variations

May 15, 2020 By Boucanier

9 Tomato Sauce Variations

Keep this handy

Mark Bittman
Photo: Romulo Yanes

You can whip up a batch of tomato sauce from scratch in the time it takes to boil water and cook pasta. Diced tomatoes are super convenient, whether in cans, cartons, or jars. Just don’t buy crushed tomatoes or tomato puree, which are both much too watery.

Canned whole tomatoes will give you an even meatier sauce and are easy enough to deal with: First, drain off the liquid from the can and save it; you may need it to thin the sauce. Don’t bother to core them, but do use a knife to hack away at the tomatoes right in the can to break them up a bit.

Try one of these variations on the main tomato sauce recipe, below.

Tomato Sauce with Fresh or Dried Herbs

Stir any of the following herbs into the sauce just before serving: ¼ to ½ cup chopped fresh basil, parsley, dill, or mint; 10 fresh sage leaves; 1 tablespoon chopped fresh rosemary, oregano or marjoram (or 1 teaspoon dried); 2 teaspoons chopped fresh thyme (or ½ teaspoon dried); or ½ teaspoon chopped fresh tarragon (or ¼ teaspoon dried).

Vegetable-Tomato Sauce

Chop up whatever leftover vegetables you have and warm them up in the sauce just before serving. If you don’t have anything handy, chop 2 cups raw eggplant, zucchini, cauliflower, broccoli, or bell peppers. In Step 1, cook them alone in the oil until the vegetables are soft and tender, 10 to 15 minutes; add more oil to the pan if it starts to look too dry. Remove the vegetables with a slotted spoon, then add the onion to the pan and continue with the recipe. When the sauce is almost done, stir the vegetable back in just long enough to heat through.

Spicy Tomato Sauce

Known as arrabbiata. Skip the onion and put 1 tablespoon chopped garlic in the oil along with 1, 3, or 5 small dried red chiles or a big pinch of crushed red pepper. Cook, stirring, until the garlic is brown — deeply colored but not burned — then turn off the heat for a minute, add the tomatoes, and proceed. Remove the whole chiles before serving.

Tomato Sauce with Fresh Mushrooms

Cook 1 pound sliced trimmed mushrooms (any kind) along with the onion until they shrink and all their liquid evaporates, 5 to 10 minutes; then add the tomatoes and proceed with the recipe.

Cheesy Tomato Sauce

Right before serving, stir in 1 cup cubed fresh mozzarella cheese or use ½ cup ricotta or goat cheese for a creamier, milder sauce.

Puttanesca Sauce

Skip the onion and put about 1 tablespoon chopped garlic in the oil along with a few oil-packed anchovies. Mash the anchovies a bit as you stir; wait to add salt until the sauce is done. Just before adding the tomatoes, stir in 2 tablespoons drained capers, a pinch of red pepper flakes if you like, and ½ cup pitted, oil-cured black olives.

Meaty Tomato Sauce

Start by cooking up to 1 pound ground beef, pork, lamb, chicken, or turkey with the oil and onion until it browns, 5 to 10 minutes, before adding the tomatoes. You can also use sausage; just break it up into chunks as it cooks. Adjust the heat so the meat browns without burning.

Tomato Sauce with Seafood

When the sauce is ready, stir in up to 1 pound peeled shrimp, lump crabmeat, or chopped, cleaned squid, or scallops. Reduce the heat, so it bubbles gently, cover, and cook until the seafood is warmed or cooked through as necessary, 1 to 5 minutes. Or add a 6-ounce can of oil-packed tuna to the pan when you add the tomatoes.

Fresh Tomato Sauce

This takes a few minutes longer to prepare than canned. For a meatier sauce, use Roma (plum) tomatoes; slicing tomatoes have a brighter taste and thinner texture. Cherry tomatoes are fine if you cut them in half and don’t mind the chewiness of the skins, but they’ll never quite come together into the sauce the same way. In any case, figure about 2 pounds per recipe. I don’t bother to peel or seed them, but I do remove the cores. If you want to get rid of the seeds: Cut them in half — lengthwise if they’re Roma; around the equator, if they’re slicers — and gently squeeze out the watery interior. Then cut them into 1-inch chunks and proceed with the recipe.

Now, on to the main recipe.

How to Cook Pasta

Here’s your refresher

heated.medium.com

Pasta with Tomato Sauce

Time: 25 to 30 minutes
Makes: 4 servings

Ingredients

  • Salt
  • 3 tablespoons olive oil, or more as needed
  • 1 medium onion, chopped
  • One 28-ounce can diced tomatoes, including the juice
  • Freshly ground black pepper
  • 1 pound any dried pasta
  • ½ cup freshly grated parmesan cheese, plus more for serving
  • ½ cup chopped fresh basil leaves for garnish, optional

Instructions

  1. Bring a stockpot of water to a boil and salt it. Put the oil in a large skillet over medium-high heat. When it’s hot, add the onion. Cook, stirring occasionally, until soft, 2 to 3 minutes. Add the tomatoes and sprinkle with salt and pepper.
  2. Adjust the heat, so the sauce bubbles enthusiastically and cook, stirring occasionally until the tomatoes break down and the mixture begins to thicken and appear more uniform in texture, 10 to 15 minutes. Taste, adjust the seasoning, and adjust the heat, so the tomato sauce stays hot but doesn’t boil.
  3. When the water boils, cook the pasta until it is tender, but not mushy; start tasting after 5 minutes. When it’s done, scoop out and reserve at least 1 cup of the cooking water, then drain the pasta.
  4. Add the pasta and a splash of the cooking water to the sauce in the skillet and toss to coat, adding a little more cooking water or oil if necessary to create a slightly creamy sauce. Taste and adjust the seasoning and add more oil if you’d like. Then toss with the cheese and the basil if you’re using it. Serve, passing more cheese at the table.
  5. Here’s how to make extra sauce for the freezer: Complete the sauce through step 2, doubling the amounts of oil, onions, tomatoes, and salt and pepper. Let half of the sauce cool and pack it in sealed containers and freeze. Eat within 6 months or so. To defrost, heat it slowly in a pan over low heat, let it sit overnight in the fridge, or microwave it.

— From How to Cook Everything: The Basics

Filed Under: Cooking, Umami Tagged With: BBQ Sauce, Carolina BBQ Red Sauce, Tomato Sauce

Cooking Terms All Chefs Should Know

May 12, 2020 By Boucanier

Cookbook

Prime Publishing LLC

Published by Prime Publishing LLC

View

French Cooking Terms

When you're first learning to cook, the vocabulary can be a little intimidating. Much of the terminology of cooking and baking comes from other languages, which can make the whole process even more difficult (and hard to pronounce).

French cooking terms, in particular, are notorious for being complicated and intimidating. While many of them do refer to techniques that are complex and extravagant, there's a good chance that you've done some of these things without even knowing the name for it. That's why we put together this dictionary of French cooking terms. The next time you come across a term in a recipe that you aren't familiar with, consult this guide, and you'll have your answer in no time.

From bain-maries to hors d'oeuvre, expand your vocabulary and channel your inner Julia Child with these French cooking terms and cutting techniques!

French Cooking and Preparation Techniques

Bain-marie: Also sometimes called a double boiler, a bain-marie is a method of melting chocolate that prevents the chocolate from seizing up. To do this, simply bring water to boil in a small- to medium-sized pot, and then place a glass bowl on top of the pot. In the glass bowl, place the chocolate and the fat that you are using to melt the chocolate (usually butter or coconut oil). Then stir the chocolate until it is completely melted.

Blanche(r): Blanching is a method of preparing and preserving foods -- usually vegetables -- for long-term storage and freezing. This requires boiling the vegetables in water for about 5-10 minutes and then immediately putting the vegetables in a bath of ice water.

Brûlé(e)(r): You've probably seen this word in the past participle form, "brûlée," in crème brûlée. This is the French word for "to burn." In cooking, this usually means with a blow torch.

Learn French Cooking from the Master
Julia Child is credited with bringing tasty French dishes into American homes. If you're looking to try something french, consider one of her classic recipes.

Find our full collection here: 47 Classic Julia Child Recipes

Confit: A confit is a term for slow cooking in oils and fats, like a low-temperature version of frying. "Confit" comes from the French word for "to prepare."

Cuisson: "Cuisson" is simply the French word for "baking" and is used by chefs to refer to the quality of the bake or the cooking process and the skill of the chef. Something that is overcooked or undercooked would not have a good cuisson.

Dégorge(r): A method of removing juices from meat and vegetables (often fish). This method involves salting the meat and then soaking it in water and is usually done to remove strong or overwhelming flavors.

Dépouille(r): Removing the fatty layer of "skin" that appears on the tops of broths, stews, and sauces.

En croute: Refers to food that is wrapped in dough or a pastry and baked.

En papillote: Refers to food that is wrapped in parchment paper or foil so it will cook in its own steam.

Flambé(r): A method of brûléeing food by adding alcohol (usually brandy) and then lighting it on fire to burn out the alcohol.

Fondre (fondue): The French word for "to melt." The past participle form, "fondue" usually refers to melted cheese or chocolate that is used as a communal condiment.

Frappe(r): The French word for "to hit" or "to strike." This word is often used to refer to something that has been put through an ice bath or blended with ice.

Gratin(ée): The French word for "to grill." This word usually refers to a method of browning that involves adding breadcrumbs and cheese to a dish and then browning it in the broiler.

Quadrillage: The method of grilling meat and vegetables to create a grid pattern from the grill marks.

Sauté(e)(r): From the French word for "to jump," sautéing simply refers to the act of flipping a pan to make the ingredients "jump." (Pictured below)

Sous vide: From a French phrase that refers to something in a vacuum, sous vide is a method of cooking that involves sealing food in air-tight plastic containers and submerging in hot water in order to cook the food evenly and thoroughly to prevent burning or overcooking.

Curious About Sous Vide?
Check out our full article on sous vide cooking, how it works, and why you should try it! Learn all about the art of vacuum-sealed cooking. You might even want to try it after exploring sous vide 101. What Is Sous Vide Cooking?

What Is Sous Vide Cooking?

French Cutting and Dicing Techniques

Alumette: A baton-style cut that is thicker than a Julienne but thinner than a Battonet.

Batonnet (or Jardinère): From the French word for "little stick," this style of cutting will give you small batons, like a thick Julienne.

Brunoise: A fine dice, usually made by dicing from an alumette cut. Often vegetables that are cut in the brunoise style are cooked in butter and used for flavoring soups and sauces.

Chiffonade: To cut into fine strips or ribbons.

Concasser: From the French word for "to crush," this refers to a rough chop or crushing, often of tomatoes.

Julienne: A very fine slice, like a thin stick or baton.

Mince: A very fine dice, usually made by dicing from a Julienne cut.

Paysanne: A thick, rustic style of dice, usually made by dicing a thick baton cut.

Rondelle: A round dice.

Can't keep your cutting and dicing terms straight? Check out this handy infographic below. And click here to download the infographic.

Types of Cutting and Dicing

French Terms for Parts of the Meal

Apéritif: A drink, usually alcoholic, that is used to prepare the palate for the meal. These are typically heavy and dry beverages.

Amuse-bouche: A French term that means "mouth tease," an amuse-bouche is a kind of appetizer.

Dégustation: A series of small courses, like samplings.

Digestif: The opposite of the apéritif, a digestif is a drink, usually alcoholic, served after the meal. These are often lighter, sweeter dessert wines that are said to help with digestion.

Entrée: From the French word for "entrance," this term used to refer to the course that would "introduce" diners, so-to-speak, to the main course. Now this word commonly just refers to the main course of the meal.

Entremet: The French word for "interlude" or "intercede," this refers to a small dish, usually a dessert besides a pastry, that is served between courses as a way to cleanse the palate.

Hors d'Oeuvre: A type of appetizer. The French phrase means something that's outside of one of the main courses of the meal.

Filed Under: Cooking Tagged With: Cook School, French Terms

About the Art of Living

January 13, 2020 By Boucanier Leave a Comment

What Anthony Bourdain Taught us About the Art of Living

Lauren MacNeish

Lauren MacNeish

Aug 13, 2018 · 5 min read

Photo: Laurie Woolever/Grub Street

When Anthony Bourdain’s name was trending on June 8th, the last thing I expected to see was news of his death. It hit like a punch to the gut. I’ve been following Bourdain’s travels for years. It seems insignificant to say that he merely wrote about food and travel; he wasn’t just a celebrity chef or a travelling food writer. To say that Anthony Bourdain was a ‘good writer’ would be the greatest disservice to a man that made food and travel writing kinetic and gave no time to the usual artifice of television and travel writing. When he famously said to the New Yorker in 2017, “I travel around the world, eat a lot of shit, and basically do what the fuck I want”, this was a classic Bourdain understatement.

“Without new ideas success can become stale.”

His dark humour and caustic wit allowed him to captivate the minds of those that listened to him or read his writings. He lived a life that he didn’t take too seriously and opened the door to the unexpected appetising spots across the world; some gritty and some beautiful. It’s an understatement to say that Bourdain was a culinary giant; he taught us life lessons in how to love, how to travel, how to eat, and how to live. I’ll miss reading about his adventures that filled me with a yearning to ‘be like Bourdain’ but will be forever grateful for the inspiration and lessons he, unknowingly, taught us. Here’s four of them…

“Your body is not a temple, it’s an amusement park. Enjoy the ride.”

This is one of my favourite quotes by Bourdain. In a world that constantly churns out negative news about how we’re living and how we should cut out this thing in favour of that thing, it was always refreshing to hear Bourdain tell us to live life to the fullest. It’s this vibrancy that fascinated me about him. I’m not sure if it was the allure of travel, food, or drink that kept me reading Bourdain, but what I do know is that I saw a guy who was doing what I dreamt of doing, with an attitude for life I wanted to have. Anthony Bourdain was an inspiration for embracing life, cutting out the shit, and doing more of the things that make us happy — is there any greater lesson than that?

“Meals make the society, hold the fabric together in lots of ways that were charming and interesting and intoxicating to me. The perfect meal, or the best meals, occur in a context that frequently has very little to do with the food itself.”

Go off the beaten track.

Bourdain once said: “Travel isn’t always pretty. It isn’t always comfortable. Sometimes it hurts, it even breaks your heart. But that’s okay. The journey changes you; it should change you. It leaves marks on your memory, on your consciousness, on your heart, and on your body. You take something with you. Hopefully, you leave something good behind.”

He was renowned for taking us off the beaten track and had a knack for making us feel like we were there with him. He led us down the streets less travelled, into the homes of waiters and busboys, and here is where the people danced, ate, played dominos, laughed, and drank.

Celebrity chefs usually take us to picturesque scenes, usually in some Italian village or the French Riviera, but Bourdain took us to those less glamourous and shone a light on them. The Congo comes to mind. It probably helped to be a male with a camera crew, but let’s not take away his gutsiness and authentic ability to show us those roads less travelled.

“If I’m an advocate for anything, it’s to move. As far as you can, as much as you can. Across the ocean, or simply across the river. The extent to which you can walk in someone else’s shoes or at least eat their food, it’s a plus for everybody. Open your mind, get up off the couch, move.”

Respect the culture.

Bourdain’s attitude of openness and eagerness to learn was infectious. He taught us, with an enthused courteousness, that — no matter where we sit in this world — we’re more alike than we are different. Wherever he was, he was impassioned to eat their food, hear their music, and see their culture through their eyes.

“You learn a lot about someone when you share a meal together.”

The ‘no assholes’ rule.

Bourdain once said: “It is truly a privilege to live by what I call the ‘no asshole’ rule. I don’t do business with assholes. I don’t care how much money they are offering me, or what project. Life is too short. Quality of life is important. I’m fortunate to collaborate with a lot of people who I respect and like, and I’d like to keep it that way.”

If you’re reading this on your dreaded morning commute or on your way home from another day at the office with the ‘assholes’, you’ll know that we don’t all have Bourdain’s ‘privilege’, as he put it. But it’s something to aspire to, isn’t it?

“Skills can be taught. Character you either have or you don’t have.”

Lessons for life.

Some of Bourdain’s lessons were stated plainly, while others were revealed less obviously. He wanted to encourage us all to learn more by slowing down and showed us that travel isn’t about living in a postcard, but an embracement of people and culture.

Tall, tattooed, quick witted, with an infectious attitude for life, Anthony Bourdain had an idiosyncratic way of sharing his love for the world. He had a way of projecting his steeliness; an invisible armour that protected him from the demands of the public eye, and — while the cruellest enemy of all is what got him in the end: the enemy within — he was the real deal. Anthony Bourdain: the benchmark of our creative outlook.

Has Anthony Bourdain inspired you in any way? I’d love your thoughts.

Keep in touch on Twitter and Instagram.

View more at: laurenmacneish.com

Filed Under: Cooking, Umami

The Perfect Dish: Babi Guling

December 24, 2019 By Boucanier Leave a Comment

Umami Media

Umami Media Follow Oct 2, 2018 · 2 min read

Babi guling (suckling pig) is possibly Bali’s signature dish, with streetside warungs (hawkers) and famous restaurants vying for the title of the island’s best joint.

Often hotly contested by lovers of the dish is where one can find the best rendition of babi guling. Connoisseurs of the dish go on road trips, visiting all the famous spots to sample all the various takes on the classic Balinese dish. From famous joints in Jimbaran packed all-day long with ravenous diners to hidden back-alley secret spots in Canggu open only in the wee hours of the dusk, the depths of a cult following that the dish inspires is mind-boggling.

A traditional Balinese dish, the pig is typically cut, cleaned and stuffed with an assortment of aromatics, the proportion and mixture of which are closely-guarded secret handed down through the generations by individual vendors. Spices commonly used include salt, pepper, garlic, ginger, galangal, chili, shallots, turmeric, coriander seeds, lemongrass, and kaffir lime leaves. Once marinated and infused with the spices, the pork is grilled over spitfire and basted till it is cooked to crisp perfection. The crackling is separated, the meat is sliced and both are portioned atop steaming hot white rice, accompanied by lawar (Balinese salad) and sambal matah (Balinese chili dip) for one’s enjoyment.

Whether one is a first-time traveler to Bali or a returning visitor, a trip to a babi guling joint is something of a mandatory checkpoint amongst other delicious offerings on the island.

DIRECTORY

Babi Guling Sanur

Jalan Bypass Ngurah Rai

Sanur, Bali, Indonesia

T: (+62) 361 2873 08

Warung Babi Guling Pak Malen

Jalan Sunset Road, №554

Seminyak, Bali, Indonesia

T: (+62) 851 0045 2968

Filed Under: Cooking, Umami Tagged With: Dish, Pig, Pork

The Science Of Cooking Prime Rib.

December 19, 2019 By Boucanier Leave a Comment

And Other Beef Roasts Recipe

By Meathead Goldwyn

Is there anything more festive, impressive, and luxurious than a big juicy beef roast? Well it’s easy to make outdoors and it definitely tastes better, but my techniques work fine indoors and for all types of beef roasts.

Our goals

Here are the benchmarks we will strive for. I will explain them in detail further down the page.

1) Maximum tenderness and juiciness. Beef roasts are at their best when cooked to 130°F to 135°F internal temp. That’s medium-rare when it is no longer purple but deep red, and not yet pink.

Placeholder

2) Even color. We want the same red color bumper to bumper with no overcooked meat beyond 1/4″ deep. We don’t want a rainbow of colors starting with a band of gray meat below the crust, then tan, then pink, and finally, in the center, just a bit of properly cooked red meat.

3) Crust. We want a lot of deep dark crunchy crust enriched by salt, herbs, and spices mixing with beef juices that are squeezed out by the heat, and dried to bark by the roasting process.

4) Easy carving. We don’t want to struggle with removing a rack of bones at tableside, we don’t want juice all over the tablecloth, and we don’t want to look more foolish than usual.

Click here to read more…

Here’s our Beef Roast recipe!

Print Recipe

Roast

Let’s get to the recipe. Although I focus on rib roasts below, almost everything here applies to all other beef roasts, although other roasts do not have rib bones.

Course. Dinner. Entree.

Cuisine. American.

Makes. 6 large servings

Prep time (ideal). 1 hour to remove fat and silverskin, tie up, and salt. 4 to 24 hours to allow the salt to migrate deep into the roast. 30 minutes to make and apply the dry rub.

Cooking time. In order to reach medium-rare, 130 to 135°F, in the deepest part of a roast, if it is boneless and hovering above a pan with liquid in it, if cooking starts with the meat at refrigerator temp of about 38°F, if air temp at the level of the meat is 225 to 250°F, estimate about 30 minutes per inch in diameter plus 20 minutes to sear at the end of the cook, about 5 minutes on each of the four sides. That means for a 4″ thick roast, cooking should take about 2 hours of indirect cooking, plus about 20 minutes searing over direct heat.

Resting. It is not necessary to rest the meat! If you do, it can continue to cook, a phenomenon called carry-over. You won’t lose any juices if you capture them and pour them over the meat. A lot will be reabsorbed. Read my article on resting meat.

Here’s a video that hits the highlights of this recipe.

Ingredients

1 beef rib roast, bones on, about 3 bones wide, about 8 pounds before trimming, about 5 pounds after trimming, cooking, and shrinkage

1/2 teaspoon kosher salt per pound of trimmed meat (1/4 teaspoon table salt)

1 teaspoon Mrs. O’Leary’s Cow Crust per pound of trimmed meat

Gravy (optional)

3 or more beef ribs or other beef bones

Meaty trimmings from the roast with a little fat

2 medium onions, root end removed, skin left on, and cut into quarters

2 carrots, peeled and chopped into 1″ lengths

1 stalk celery, leaves left on, cleaned, and chopped into 1″ lengths

3 tablespoons soy sauce

2 dried mushrooms

1 cup dry red wine

1 teaspoon Mrs. O’Leary’s Cow Crust

1 bay leaf

32 ounces of water

About the salt. Table salt and kosher salt contain different quantities of sodium and chloride per volume measurement. Click here to read more about different salt types and how to substitute one for another.

About the mushrooms. Just about any dried mushroom will do: Porcini, wood ears, whatever. Just toss them in. As they absorb the liquid they exude the essence of mushroom and add umami, a savory flavor amplifier.

Serve with. A big red wine.

Method

1) 24 hours before cooking. Remove the rib bones and save them for the gravy or for another meal. The gravy is optional and most of the time I don’t bother since the meat is so juicy. There’s plenty of meat between the bones and these beef baby backs can be cooked just like pork baby backs for a real treat.

Trim off all the fat cap from the top. Go ahead and trim right down to the meat. Make sure to get the silverskin too, it can be chewy. Save any pieces that are more meat than fat for the gravy. Save the silverskin for the gravy too. Some of it melts into gelatin.

Placeholder

I leave most of the fat on the side where the bones were because it is hard to remove and it’s not very thick. But the fat cap has got to go.

2) Make it as round as possible. When you have bare naked meat, it is sort of tear-drop shaped. Press on the sides squishing it into a round tube. If necessary, tie it with string every inch or two to hold it round.

3) Dry brine 6 to 24 hours before cooking. Sprinkle it with about 1/2 teaspoon kosher salt per pound of trimmed meat (1/4 teaspoon table salt). It’s a bit hard to measure so here’s how I do it. I use kosher salt which is a larger flake than table salt and it still dissolves easily on the moist meat. I sprinkle it from high above so it is evenly distributed. And I sprinkle about the same amount I would if I was about to eat the meat. Thick cuts need a bit more. Do not oversalt! Put it in the fridge. This is a method called dry brining. The salt is sucked into the meat, seasons it, and it messes with the protein structure to help retain moisture. There is a lot of meat to penetrate, so you can use the salt generously, but don’t make a thick cake of it, and you will not need to rinse it off. It will all be sucked in. You should wrap it with plastic wrap just to keep other foods from coming in contact with meat juice.

4) 1 hour before cooking. Make a spice paste with my recipe for Mrs. O’Leary’s Cow Crust, a blend of herbs and spices mixed with water. The water releases the flavors in the herbs and spices and helps with browning and forming a crust. Let it sit for at least 1 hour before applying it to the meat so the herbs can reconstitute and release their goodness. Pour most of the paste on top of the roast. Spread it around all visible surfaces working it into the meat. Turn the roast over and pour the rest on the bottom and work it around. It does not penetrate the meat so you can do this any time up to the time you cook. Do not use Meathead’s Memphis Dust or any rub with sugar in it because this meat doesn’t need sweetness and we don’t want the crust to burn. I usually just put it in the fridge without the plastic wrap because I want the flavorings on the meat, not the plastic. It’s only for an hour or so, just be careful not to cross-contaminate other food with the meat.

5) Prepare the gravy. The gravy is really a killer beef stock. You won’t need the gravy for the meat because it will be soooo juicy, but you will like it, and you will want it for my Garlic Mashed Potatoes. And you should make my Garlic Mashed Potatoes. Yes, you really should. There will be plenty of leftover gravy that you can use for Italian Beef Sandwiches, Beef on Wick sandwiches, French Dip Sandwiches, for beef soup, or for making rice or couscous. There is no end of uses for a good, rich, homemade beef stock. But if you want to skip the gravy, nobody will complain unless you overcook the meat.

Placeholder

There are three ways to make the gravy. (a) You can make it in advance indoors, (b) you can make it while cooking the roast on the grill, or (c) you can make it in advance indoors and still put it under the roast to catch smokey drippings. All three are excellent.

You can make a fine gravy with just the meaty trimmings from the roast, but it will be better if you add some bones. If you removed the bones from a rib roast use them. If not, ask your butcher for some beef bones. Throw the bones on a grill in indirect heat at about 325°F, or in a smoker, or in the oven until they are brown on the outside. If you have a bandsaw, cut the bones in half lengthwise so more marrow is exposed or have your butcher do it. Get a big pot and put all the bones in it. Add the meaty trimmings with the fat attached. Don’t throw all the fat in. Add the veggies. If there is no leftover rub, add some of the thyme, rosemary, and garlic powder.

If you are cooking it indoors, turn the pot on low and let it simmer for about 3 hours, lid off. Occasionally skim off any foamy scum. Don’t worry about skimming the fat yet. And don’t worry about alcohol, most of it boils off. Nobody will get tipsy. Your kids won’t be led down the path of degradation.

After about 3 hours strain out the bones and any other large solids and discard them. Then run the stock through a mesh strainer. Taste it and cook it down if it tastes too bland. When it is the right intensity, then you can adjust the seasonings. Refrigerate it. After several hours the fat will rise to the top and form a thick hard layer. Peel it off and discard it. If you have one of those fat separator cups you can use that. Back in the fridge, it goes for now. What remains is fine beef stock.

If you wish, you can put all the gravy ingredients into a pan and put it under the roast while it cooks in order to catch the smoky drippings. Another option is to prepare the gravy in advance indoors, strain it, and then put it in a pan under the roast to catch drippings.

6) Final prep. Set up your grill or smoker for 2-zone cooking and preheat the indirect zone to 225°F. It is very important that you not cook hotter than 250°F or so. I don’t care what the cookbooks or the TV chefs say. You don’t want to cook so hot that the meat gets dark on the outside before it is done on the inside. Watch the computer simulations above.

Clean the grates thoroughly before the gravy/drip pan goes on. Boil the gravy in a saucepan and then pour it into the drip pan. Don’t pour cold gravy in the pan. If you have a small grill, you can put the pan right over the fire. It then becomes a heat shield and the meat will be in the indirect zone. For more info on setting up your cooker, read my articles on how to set up a gas grill, a charcoal grill, a bullet smoker, and an offset smoker. And you can do this indoors!

7) Fire up. If you have a meat thermometer with a probe on a cable, and you should, insert it now so the tip is dead center in the thickest part of the meat. If you don’t have a probe you can leave in the meat, you absolutely must have a good digital instant-read meat thermometer and you should check it every 30 minutes at first, and more often as the cook progresses. You should also have a good oven thermometer that has a probe you can place near the meat in the grill/oven, but place it at least 2″ away so it is not in the cold air bubble surrounding cold meat. Read my Thermometer Buying Guide to learn how they work and which are the best.

Placeholder

If you made the gravy in advance, get it hot and pour it into the drip pan. If you haven’t made it yet, follow the instructions above and put the ingredients in the drip pan. Use hot water or else it will take a long time to heat on the grill and slow everything down.

8) Smoke. If you want a smoke flavor in the background simply add just a little bit of hardwood or fruitwood to the hot part of the cooker, about 2 to 4 ounces max right at the start of the cook. Don’t overdo the smoke. A little bit is nice, but too much can ruin it. I cannot overemphasize this. This cut of meat does not benefit from a lot of smoke. Keep it in the background. What kind of wood? I don’t think it makes a huge difference since you are using so little. Pick your favorite. I usually grab a fruitwood like apple. Read my article on the science of Wood.

9) Monitoring your meat. You will want to look under the hood occasionally during the cook but make it infrequently and quickly. During the cook check the meat temp after 30 minutes and more frequently as things move along. Check the drip pan, keeping at least 1/2″ of liquid in the pan. Add hot water if necessary. Do not let it dry out and burn. Look at the meat and if one side is getting too dark, rotate or turn the meat, otherwise there is no need to touch it. If you have a problem with your cooker, perhaps the gas runs out or the charcoals start to die or the temp just won’t stay at 225°F, or it is really cold outside, you can bring it inside after about an hour and finish it in the oven. It has gotten all the smoke flavor you need. But the drier heat and airflow on the grill makes a better crust than the oven.

10) Searing. When the temp in the deepest part of the interior reaches 115°F, remove the probe (it just gets in the way), remove any string if you used it, and place the roast over the hottest part of the grill. Remove the drip pan and bring it inside. Raise the lid and stand by your grill, as Tammy Wynette once sang (click the link for my version of her song). Get the surface a deep dark brown by leaving it on the hot part for about 5 to 10 minutes. Roll it a quarter turn and repeat on all four sides. We leave the lid up because we no longer want to roast the interior. We are focusing the heat on the exterior now. During this process, the interior will rise another 5 to 10°F anyway. Check the temp again and take it off at 130°F to 135°F for medium-rare.

If you are cooking indoors or on a pellet grill, you can sear under the broiler indoors. If you have a small gas grill just crank it all the way. On a gas smoker, remove the water pan and the wood pan and put the meat down close to the flame.

11) Finishing the gravy. While the meat is searing, pour the liquid from the drip pan through a strainer and taste it. It should be rich. If it is wimpy, dump it into a frying pan, turn the heat to high, and reduce it. It will reduce faster in a wide frying pan than in a narrow saucepan. Taste and add salt if needed only after it is the proper consistency, but it shouldn’t need salt because the drippings have salt in them. Pour the gravy into a gravy boat and serve alongside the platter of meat or ladle it on the mashed potatoes, or just freeze it for later use.

12) Serving. There is no need to rest the roast. It is a myth that this makes it juicier. Serve your meat hot! You will need a cutting board or a platter that can hold liquid. Even if you rest the meat a lot of liquid will flow. Don’t let it escape! First, remove the string. Use a really sharp knife and cut servings about 1/2″ thick. Pour any drippings from the cutting board onto the platter of cut meat. If you want to amp it up to 11, serve my Secretariat Horseradish Cream Sauce on the side.

And remember, the juices are myoglobin, not blood. Blood is thick, almost black, just like yours. Every time you call it blood, a bell rings and somewhere a teenager becomes a vegetarian.

“The animal is already dead. No need to kill it again.”Meathead

Published On: 11/11/2014 Last Modified: 12/11/2019

Filed Under: Cooking Tagged With: Christmas Dinner

Copyright © 2023 · TaTu BBQ · All Rights Reserved